I this tutorial I want to show you creating todo list app.
In this tutorial you will learn:
- Why you should use Rails
- What you need to know before getting started
- How to install Rails
- What text editor you should use
- How to start Rails application
- How to use Models and Migrations to setup database
- Using controllers and views to create list of todos
- Styling our app with Bootstrap
- What to improve in your rails app
1 Why you should use Rails
- is readable, because is written in Ruby language
- you don’t have to write SQL, thanks to ORM(Object Relation Mapping)
- it requires minimal configuration
- it has a lot of generators to save time
2 What you need to know before getting started with Rails
-
You need to have some basic knowledge of HTML, CSS. If you haven’t learn them yet go to web tutorial on codecademy
-
You need to have basics in Ruby. If you haven’t I wrote post about learning resources for ruby
-
You need to have ruby and ruby on rails installed. I will explain this in next section
3 How to install Ruby
In this post I’ve included installation instructions for Ruby and Rails
4 What text editor you should use for writting rails applications
You write all your ruby programs using text editor.
4.1 Notepad++
For Windows I recommend you this editor. It’s free and it includes syntax highlighting and auto completion for ruby.
4.2 TextMate
On Mac you can use TextMate. You can download it and install for free.
4.3 Gedit
On Linux you can use gedit.
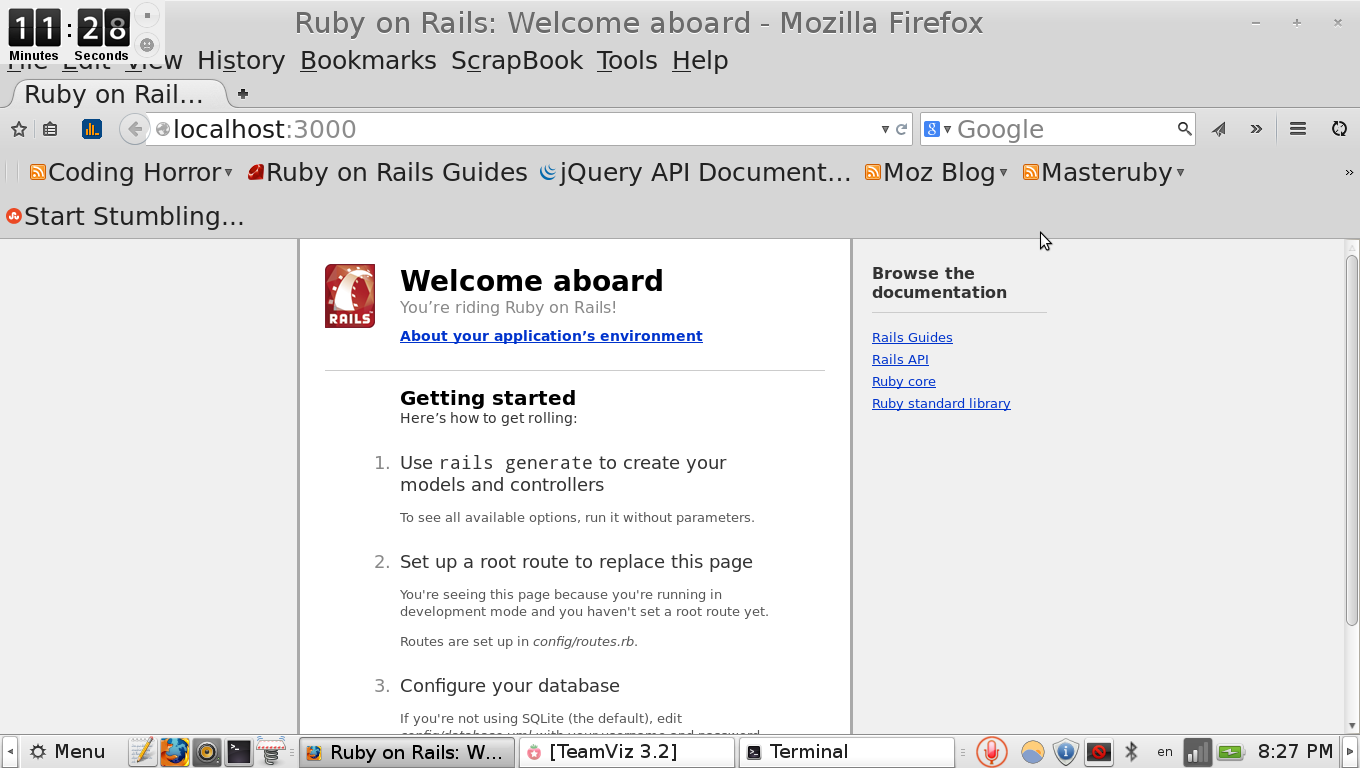
5 How to start Rails application
Ok so you’ve got your tools in order, so we can start to create application.
5.1 Creating new Rails application
Open up terminal window or command prompt if you’re on Windows and enter following code:
$ rails new todo-list-appThis will create rails application named todo-list-app. It takes a while.
5.2 Starting Rails application
Starting Rails application is easy. Just use this command in terminal:
rails serverAnd look at the rails opening screen.
5.3 Directory structure of Rails app
Our web server is now working, so we can take a look at basic structure of Rails
app/views
Views folder is place for your erb, slim or haml templates.
That’s the file that you will use to install all dependencies what you need for your applications. They’re called gems. Just add name of gem to your Gemfile and let Bundler to take care of installation.
app/views
In this folder you place your html templates.
app/assets
Images, Javascript and CSS files belongs here.
5.4 How to use Bundler to install dependencies
After creating rails application you should use Bundler to install all dependencies what you need. First add name of the gem to your Gemfile like this:
Gemfile
gem 'slim-rails'So here we’ve added slim-rails gem to our gem, which we’ll use later.
Now install it with bundler.
$ bundle install6 How to use models and controllers to setup database
To save records to database we need to use models
6.1 What are models
Models are special ruby classes that talks to database, store and validates data.
Right now when we know what models are we can create our first model.
rails generate model Todo item:stringThis command will create migration create_todos
6.2 What are database migrations
Database Migrations are…
Take look at file with name create_todos.rb
If you want to migrate our table to database.
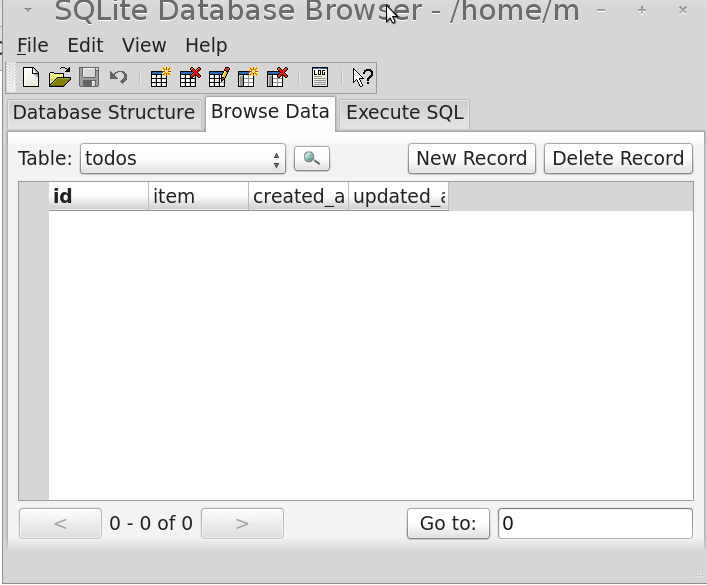
rake db:migrateThis will create new database with table todos and column item.
If you have sqlitebrowser installed you can take a look at database that we’ve just created. You should see empty database with table todos and columns like this at picture:
6.3 Insert Records to Database
Now we can start to insert records todatabase.
Open up rails console
rails consoleStart adding some todos as in the picture.
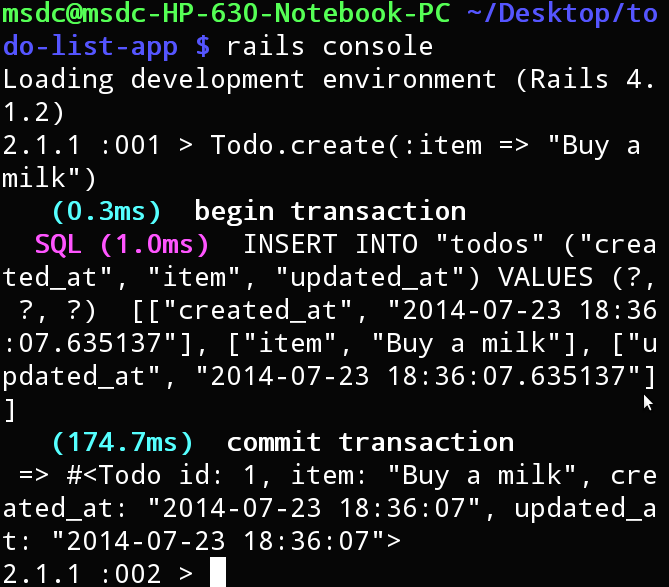
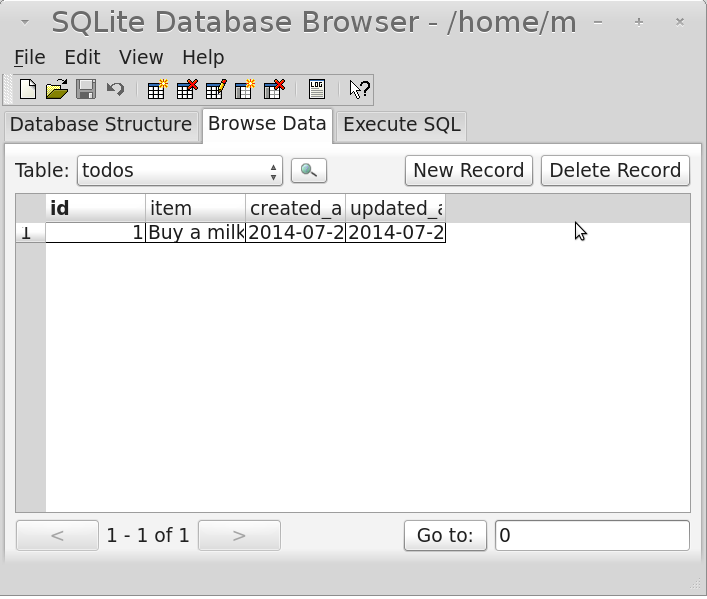
Certainly you noticed we’ve used Todowith method create I will explain this later in controller section. Check out database in sqlite browser.
7 Using controllers and views to create todos
Ok we’ve our records in database, but we want to show them in browser. To show them we need to create two parts controllers and views.
7.1 What are controllers
Controllers are user request to database. It can be GET request that is like on database is stored form and you want to show form in a browser. And it can be POST request when you fill in a form and send details to database.
Create first controller with name todo
rails generate controller todos7.2 What are views
Views are html files that user see through browser. We’ll use slim for that. To use rails effectively we need to use ruby code in html templates. Default it is ERB, but slim code is a really shorter. If you have trouble with translating HTML code to Slim, I recommend you html2slim website
7.3 Showing list of all todos
Ok let’s start with creating action that will show all of tasks to browser. First we need to record all of task in our controller.
app/controllers/todos_controller.rb
def index
  @todos = Todo.all
end
This command will checkout database for all todos and saves into instance variable todos.
Next thing we need to is to add route
app/views/todos/index.html.slim
- @todos.each do |todo|
  ul
 	  li = todo.item
If you wonder why we’ve used folder todos and file index.html.slim inside.So this is basic rails naming convention. If you have controller with name todos, you should have views folder named todos too. And for every GET action(index, new, show, edit) you should have template with name like in controller, this time it is index.
Now we can creates routes.
config/routes.rb
resources :todosTake look at this at the browser. You should see task we’ve created beforein your web browser.

7.4.1 Adding links to our homepage
app/views/todos/index.html.slim
Typing address to addressbar is really annoying, so to save time we’ll add links to our homepage.
- @todos.each do |todo|
ul
li = todo.item
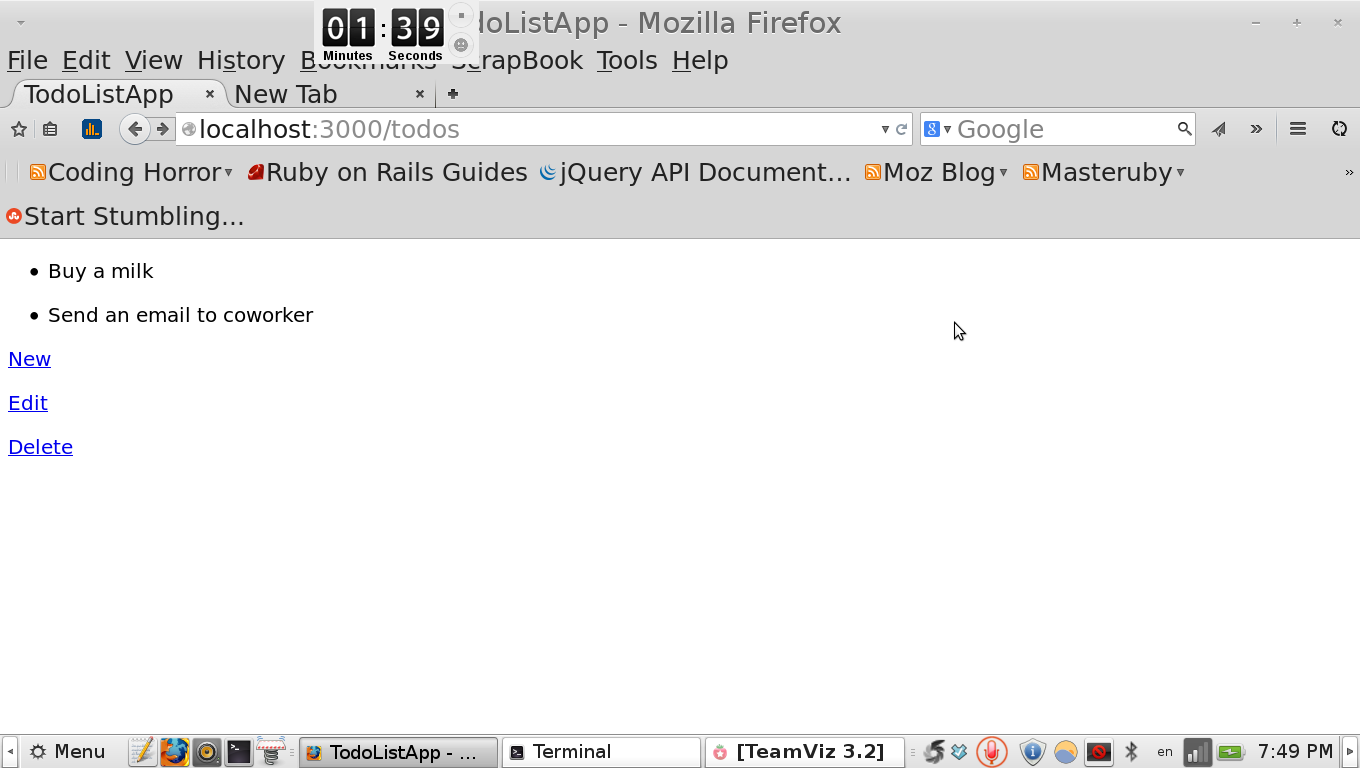
p = link_to "New", '#'
p = link_to "Edit", '#'
p = link_to "Delete", '#'7.4 Creating new todos
Now we want to create new tasks. First thing we need to do is to create new action in controller
7.4.1 Creating new action in todos controller
app/controllers/todos_controller.rb
def index
  @todos = Todo.all
end

def new
  @todo = Todo.new
end
To create our todos in browser we need to create new form in app/views folder.
7.4.2 Creating new todo form
app/views/todos/new.html.slim
= form_for(@todo) do |f|
  p
    = f.text_field :item, :placeholder => "Add new item"
  p
    = f.submit
And update home page like this
app/views/todos/new.html.slim
- @todos.each do |todo|
  ul
    li = todo.item
p
  = link_to "New", new_todo_path
p
  = link_to "Edit", '#'
p
  = link_to "Delete", '#'
Here we used form_for, that is rails helper for creating forms. Then we’ve set text_field to value of todo itemand submit it. Look at our form in a browser.
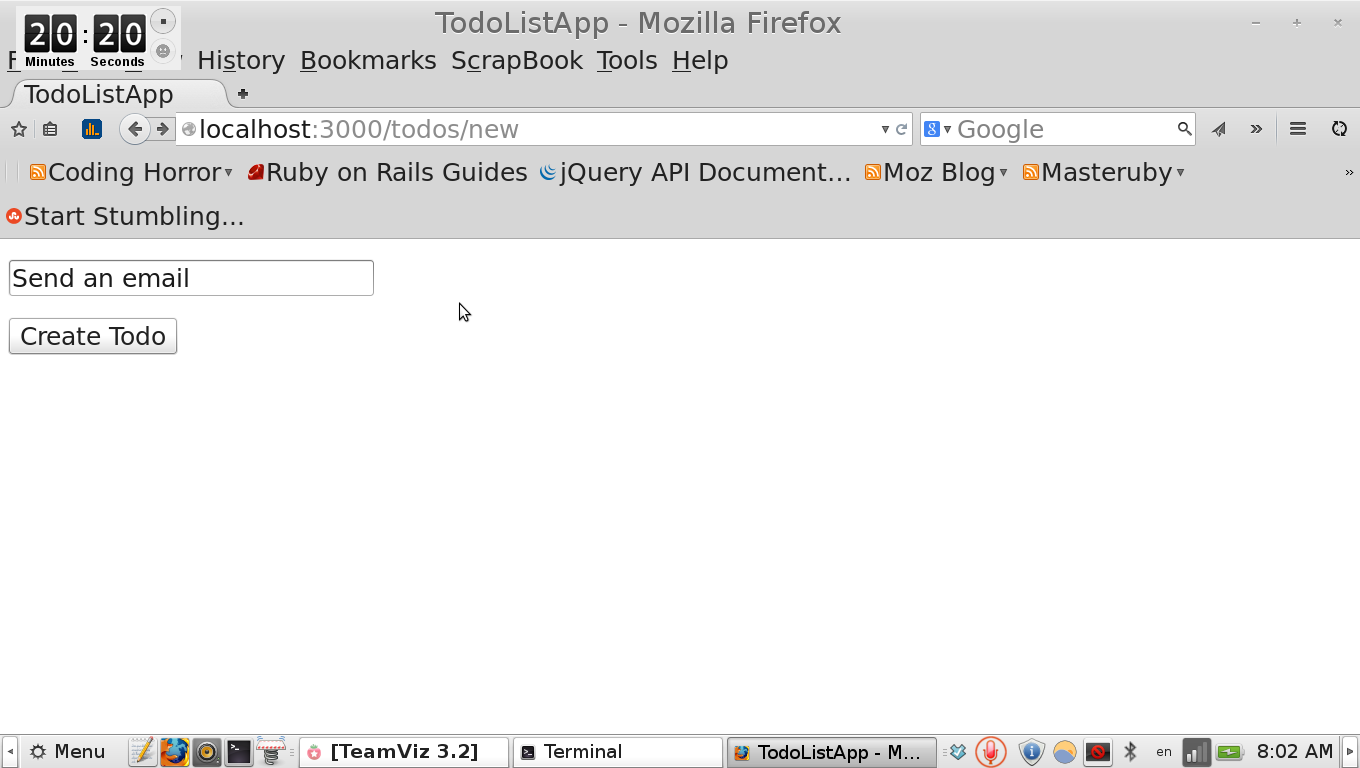
Try to submit now. You should see following error.
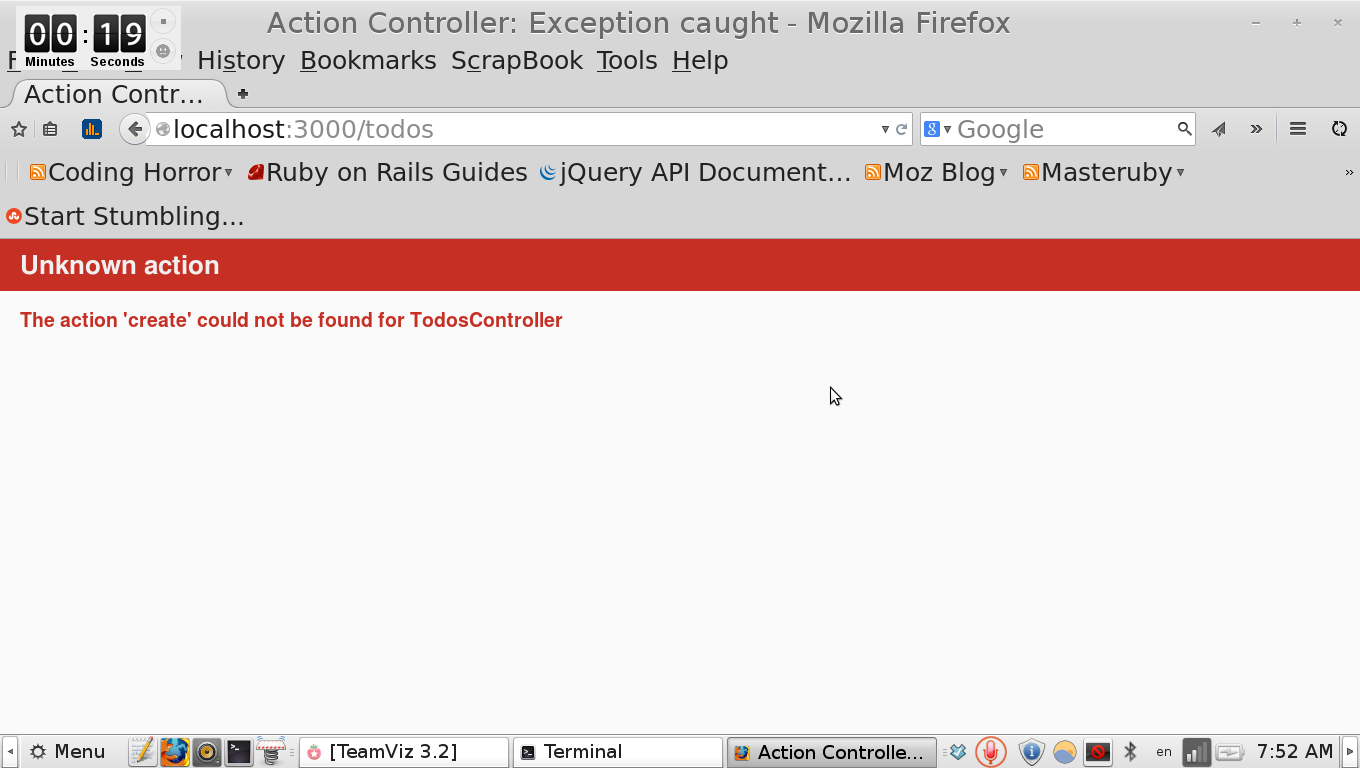
It fails because new is GET request, we’re getting form from server, but to save details we’ve added to our we need to use POST request.
7.4.3 Creating create action in todos controller
Our form doesn’t work because we haven’t set action in controller to create new todo in database.
app/controllers/todos_controller.rb
def create
@todo = Todo.create(todo_params)
redirect_to todos_path
end
private
def todo_params
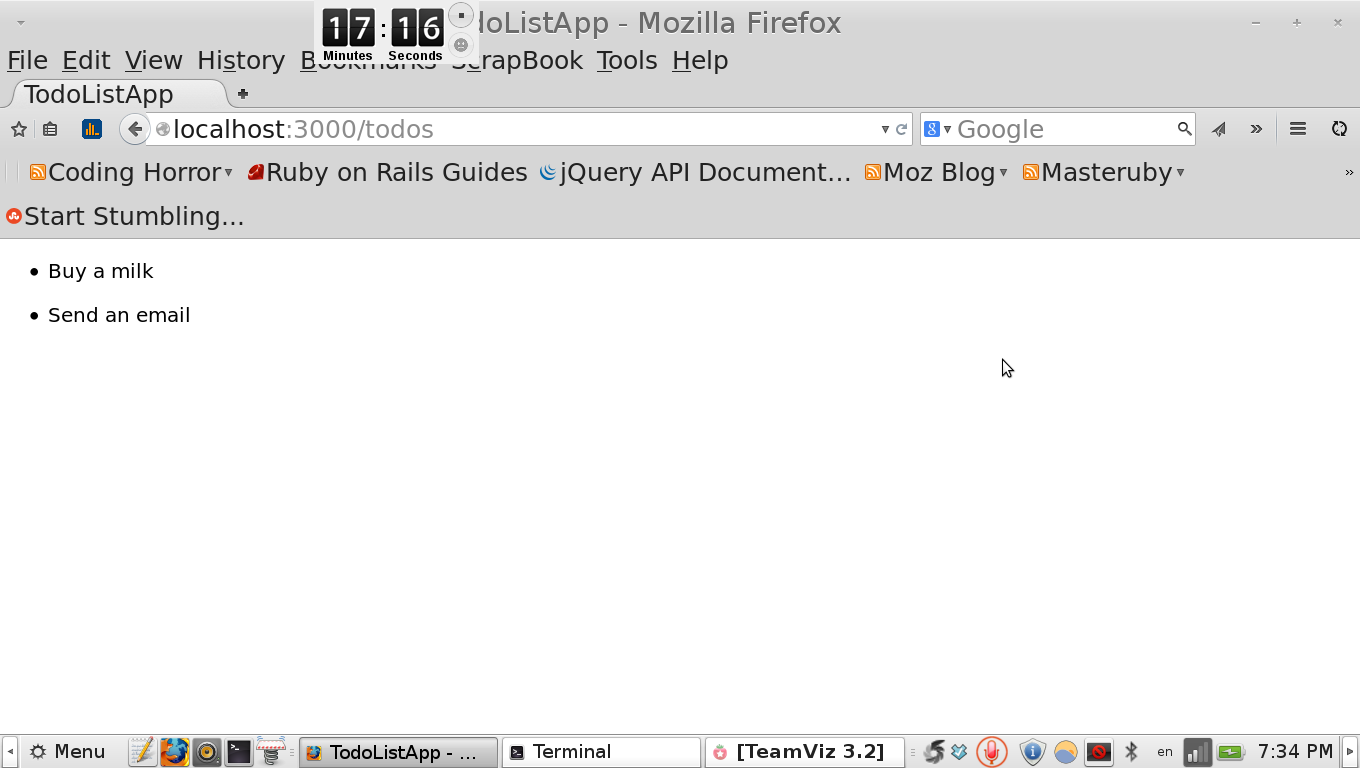
params.require(:todo).permit(:item)endAfter submitting form that redirects back to homepage.
So now you if you submit you should see your todo in list
7.5 Editing todos
Sometimes when you make a mistake, you want to edit your todo. We need to create edit a
7.5.1 Adding edit action to controller
app/controllers/todos_controller.rb
def edit
  @todo = Todo.find(params[:id])
end
To edit our todo we’ve to find it first. Every todo has id, so we’ll use special number for that.
7.5.2 Creating form for editing todos
So exactly as last time, we need to create GET request this time edit.
app/views/todos/edit.html.slim
h2 Edit todo
= form_for(@link) do |f|
  = f.text_field :item
  = f.submit
And don’t forget to add link to edit_form to your homepage.
- @todos.each do |todo|
  ul
    li = todo.item
p
  = link_to "New", new_todo_path
p
  = link_to "Edit", edit_todo_path
p
  = link_to "Delete", '#'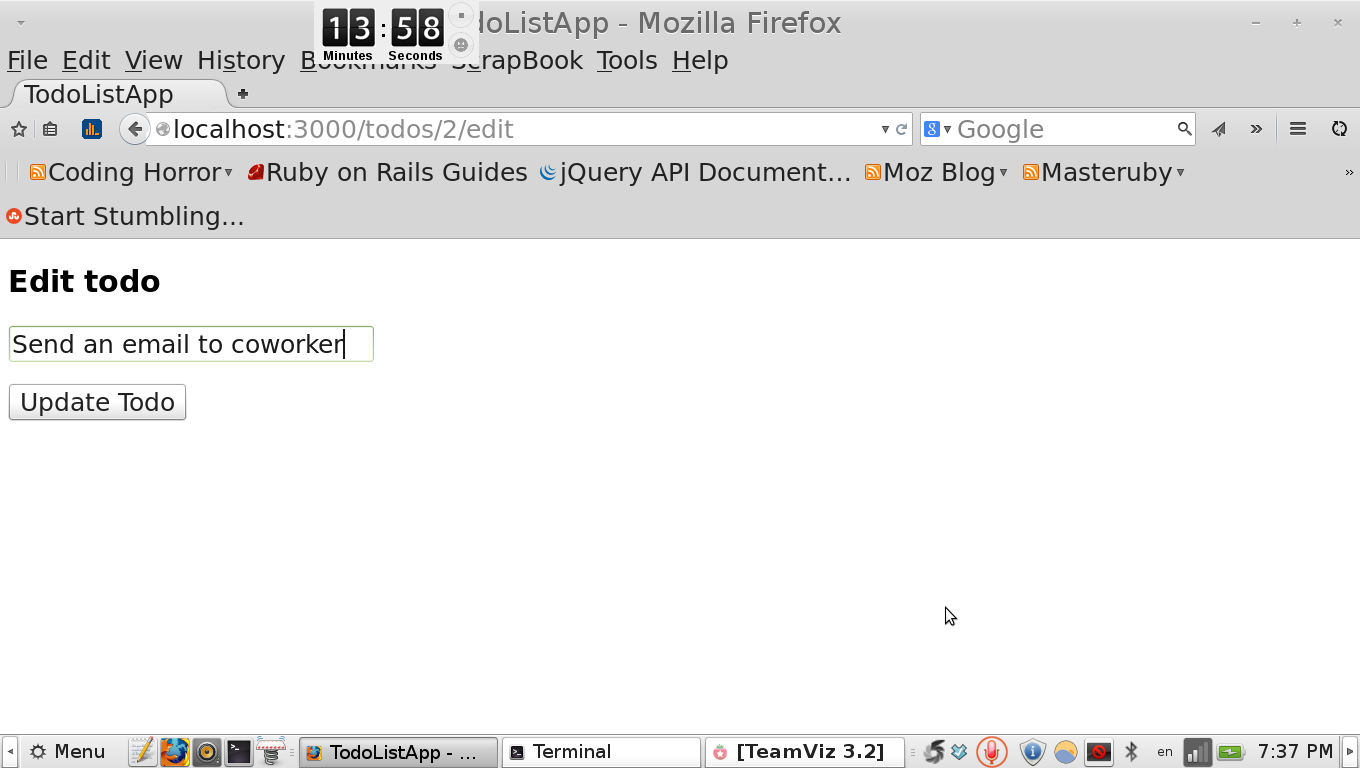
Again try to submit it, you should see following error.

Same error as a last time, but this time we need to create POST request with name update
7.5.3 Adding update action
app/controllers/todos_controller.rb
def update
  @todo = Todo.find(params[:id])
  @todo.update
If you submit form right now, you should see that our todo is updated.
7.6 Deleting todos
Sometimes when todo is done, you want to remove it. To remove we’ll use destroy action.
7.6.1 Adding destroy action to controller
app/controllers/todos_controller.rb
def destroy
  @todo = Todo.find(params[:id])
  @todo.destroy
end
8 Adding styling with Bootstrap
Our app is little bit dry. No css just plain HTML, let’s fix it. We’ll use bootstrap library for that. Add bootstrap gem to your Gemfile